NOTE: This tutorial is outdated, and no longer indicates how I make my manips. But there may be some useful tips in it, so I’ll leave it up as it was written.
A few weeks ago, I posted a tutorial about how to do some lighting and shadow effects on fembot manips in GIMP. I mentioned in that tutorial that GIMP isn’t the only software I use to make manips. I’ve settled on using a combination of IrfanView (version 4.10), MS Paint (version 5.1) and GIMP (version 2.8).
I’m actually trying to transition to using GIMP for everything, because of how flexible and powerful it is. But all the many features and sometimes confusing way things are structured within the program can make it daunting to learn and to start working right away.
If you’ve personally opened up the GIMP program and felt lost and not known where to begin, then doing it this way might help. Or you might just think I’m crazy. But I bet you didn’t think the Windows XP version of MS Paint was as powerful as you’ll see it is in a moment.
First of all, before you do anything, you must select an image to manip. I like faceoff images, so I look for images that will end up looking good manipulated that way. It’s also important to find a large, high-quality image without too many jpeg artifacts.
Once you have found an image, use Google reverse image search to find the best version available of that image. You might find a higher-resolution version, or one with better colour properties, or one without a watermark.
Next, study the image for a while. Look at it and see what you can do to it, and what problems you might have to fix.

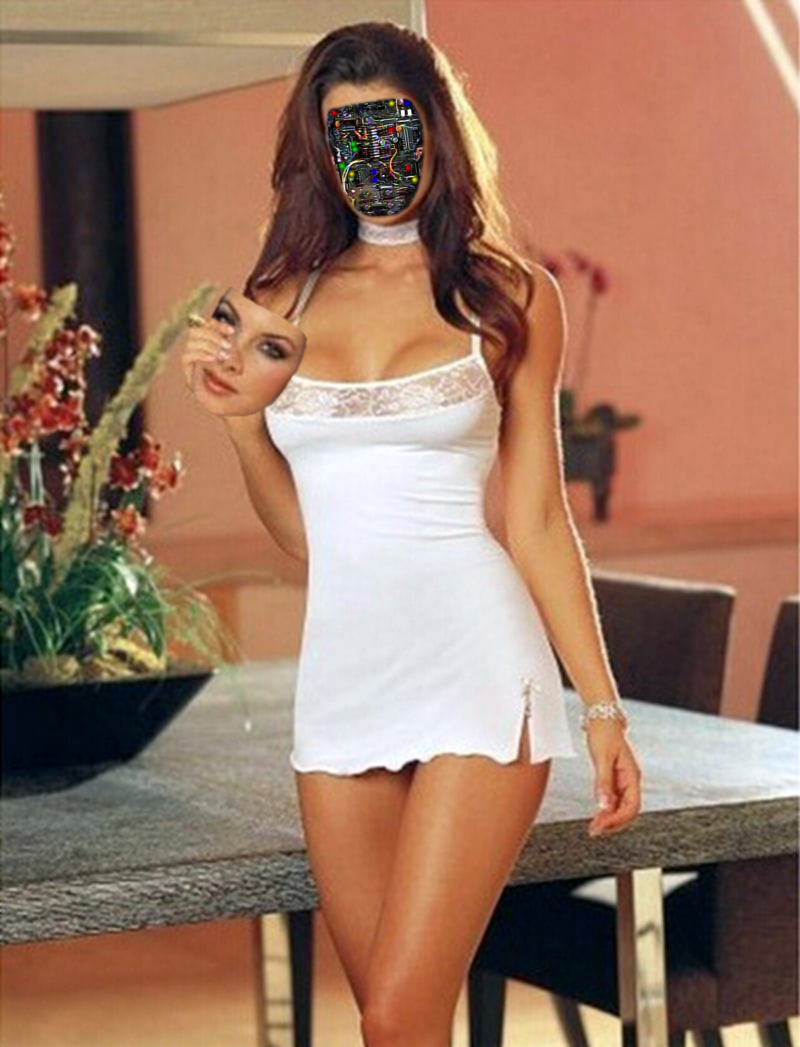
This is the original image. Click on it to see it full-size. It is a jpeg, and you can tell by zooming in that it has been resized from an original smaller size. In fact, the quality of the image is quite poor to begin with, and normally I wouldn’t bother to manip this image. But the pose she is making is quite nice, and hey, tits.
Open the image in IrfanView. Go to Image, then Auto Adjust Colors. This “instant fix” works about half the time, and with this particular image, it did the trick. It increased the contrast a bit and made it look a little less washed out.
To fix the very bad jpeg artifacts, there’s only one thing that can be done short of finding a larger version of this image, and that’s to blur it. Go to Image, Effects, then Effects browser… Set the blur at 99.

The image now looks like this:

Now that we have the “fixed” version of our original image, save it as a PNG image (with a compression level of 9). Never save as a jpeg, as that introduces compression artifacts and reduces colour fidelity.
Keep in mind that with higher-quality and higher-resolution images, fixing images like this won’t be necessary.
Select Edit, then Copy.
Open up MS Paint. (Make sure the work area is smaller than your manip, otherwise you’ll get extra white space extending past the image. To be sure of this, change the image attributes to 1 pixel by 1 pixel.)
Paste the image into MS Paint and save as a 24-bit BMP file.
In IrfanView, open up the circuitry image you wish to overlay as the faceoff effect. Study the geometry and shadows of the circuitry image in relation to the original image. If you need to flip the circuitry image, do so. I did for this manip.
Crop the circuitry image so that you’re only left with just the actual circuitry. Do this by clicking and dragging a rectangle around that area and pressing CTRL+Y.
Adjust the colours of the electronics to better match the original image.

Select Image, Enhance Colors. Every image is different, with different colour and lighting properties. Play around with the settings until you like what you see, and think that the electronics look like they will match the other image.
Now, rotate the circuitry image to match the original image.

Select Image, Custom/Fine rotation… (or CTRL+U). The model in the original image has a slight tilt to her head, which can be matched by rotating this image.
Next, resize the circuitry image.
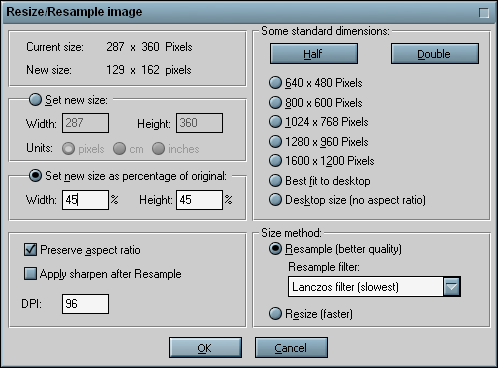
Select Image, Resize/Resample… (or CTRL+R). Be sure to have the “Resample” method selected as shown above to have the best quality result. Try to match the size as closely as possible.
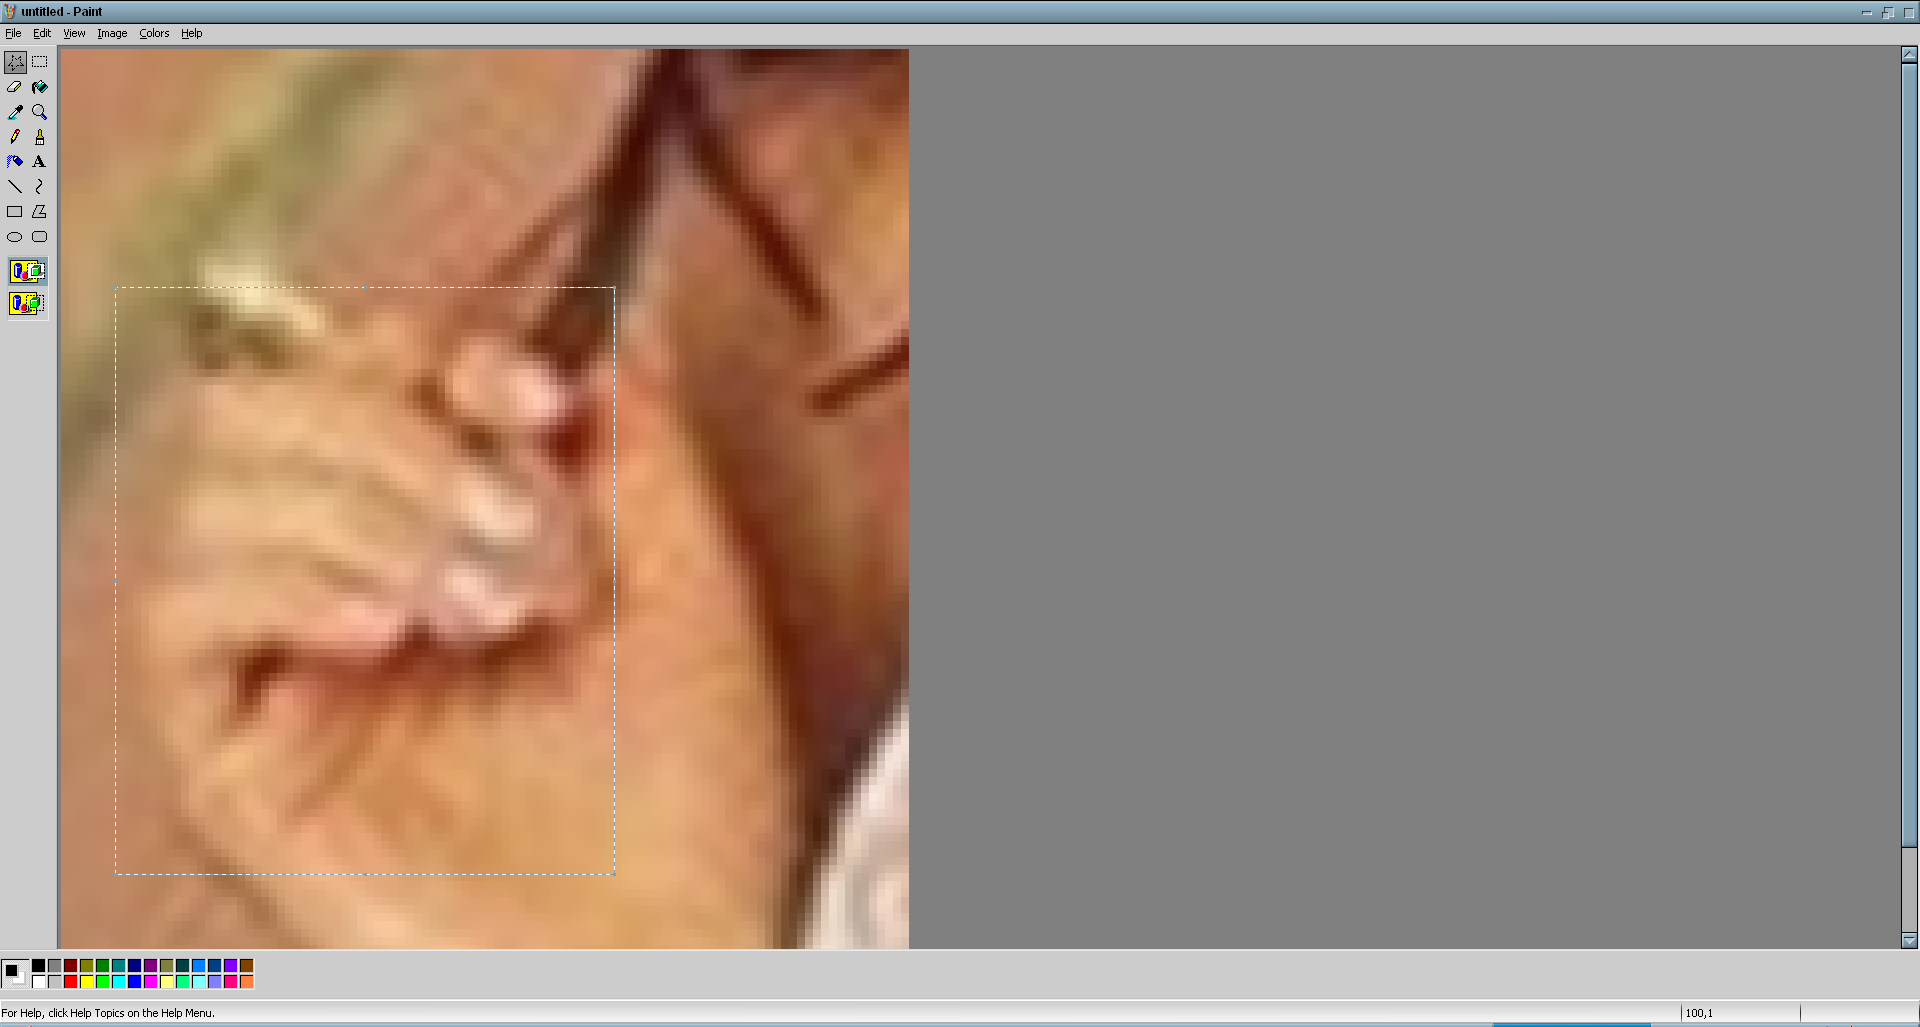
Copy the image from IrfanView, open up another instance of MS Paint, and Paste the circuitry into the 2nd MS Paint. Use the Magnifier to zoom in as close as you can while having the whole image on the screen, usually x6 or x8. (You can also zoom to x4 by selecting View, Zoom, Custom…)
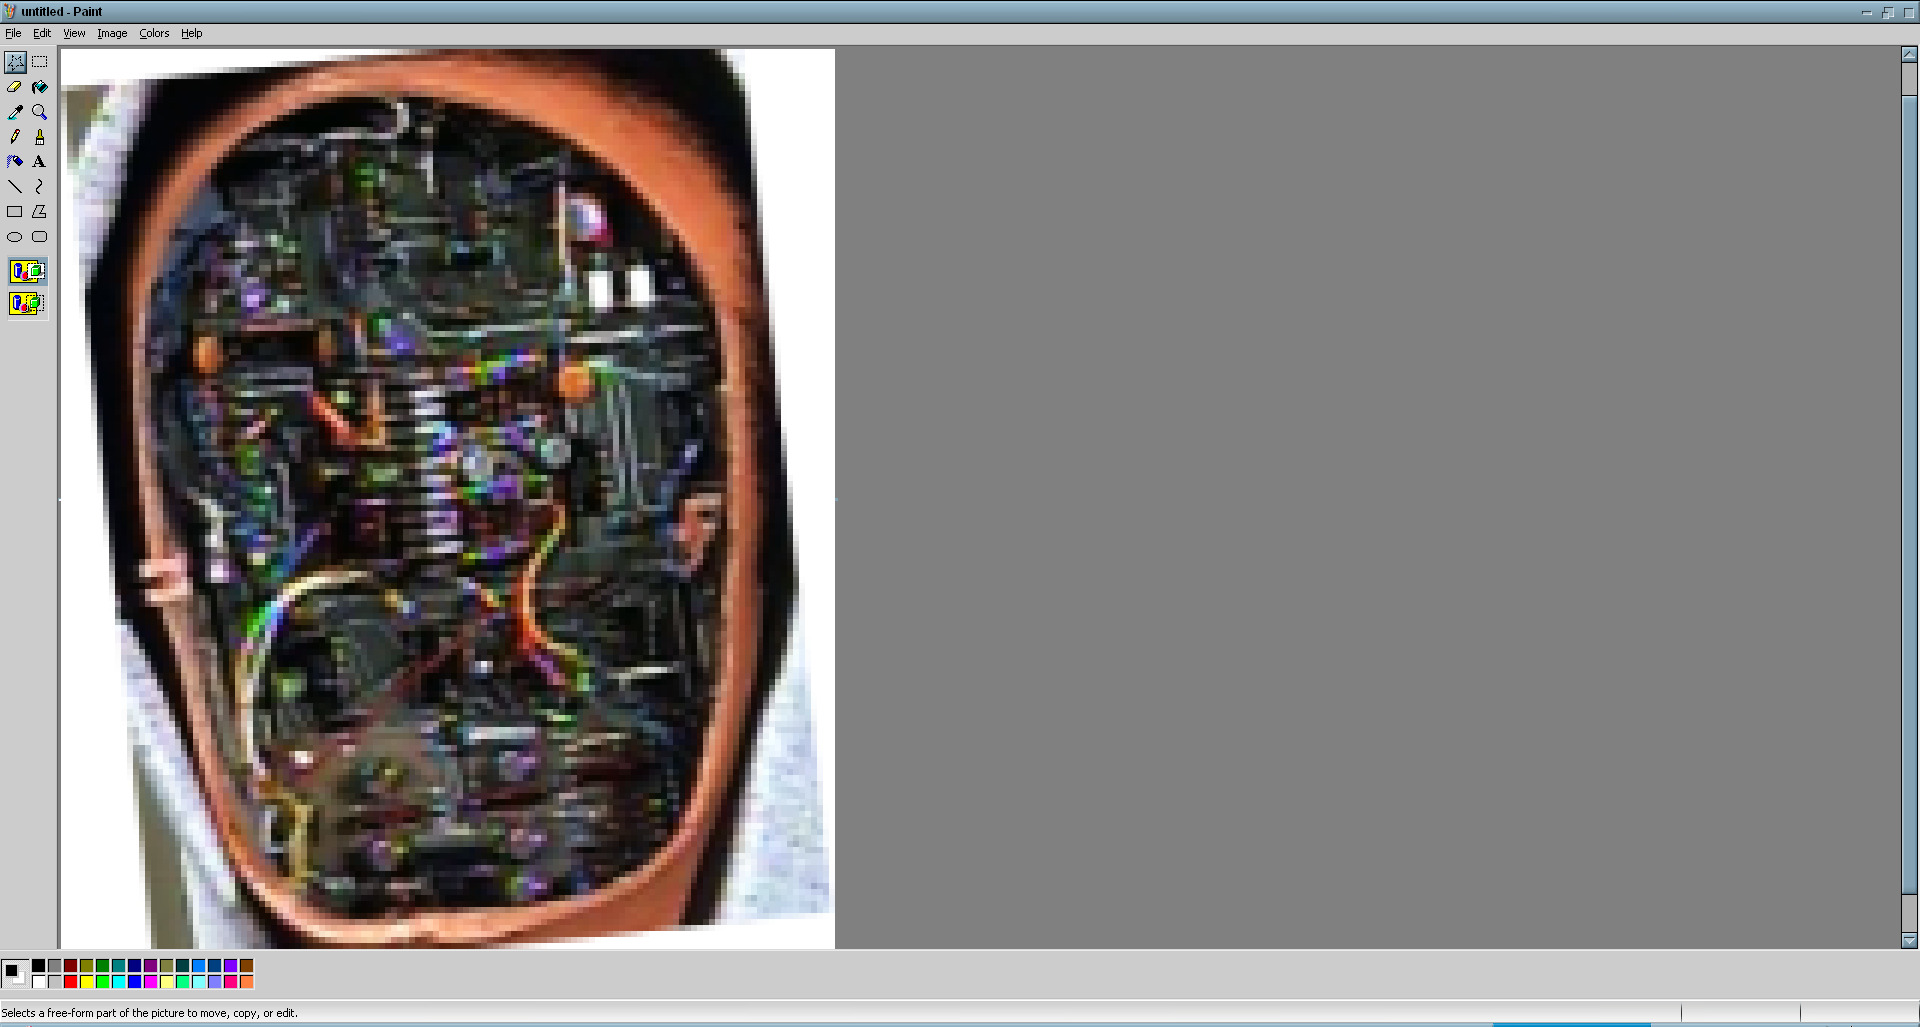
Use the Free-Form Select tool to draw the shape of the model’s faceplate around the edge of the circuitry. This may take you a few attempts.
When you’re happy with the shape you’ve selected, Copy it from the 2nd MS Paint, and Paste it into the 1st MS Paint. Be sure the transparency box at the bottom of the toolbar is set to on.

Save the BMP.
Zoom in and fix any transparent spots that should actually be the colour white.

Use the pencil tool and change the colour to white. Draw the few pixels necessary to fill in the blank spots.
Go back to the original saved PNG in IrfanView. Select an area of the model’s hair now covered by electronic circuitry. (There’s not much in this manip, but there’s some.)
Copy that area from IrfanView, and Paste it into the 2nd MS Paint.
Use the Free-Form Select tool again and follow the edge of the model’s hair along her face. Make a shape that closes back on itself.
Copy from the 2nd MS Paint, and Paste into the 1st MS Paint.

Be sure to be zoomed in as closely as possible so you can line up the patch pixel-by pixel.
Save the BMP.
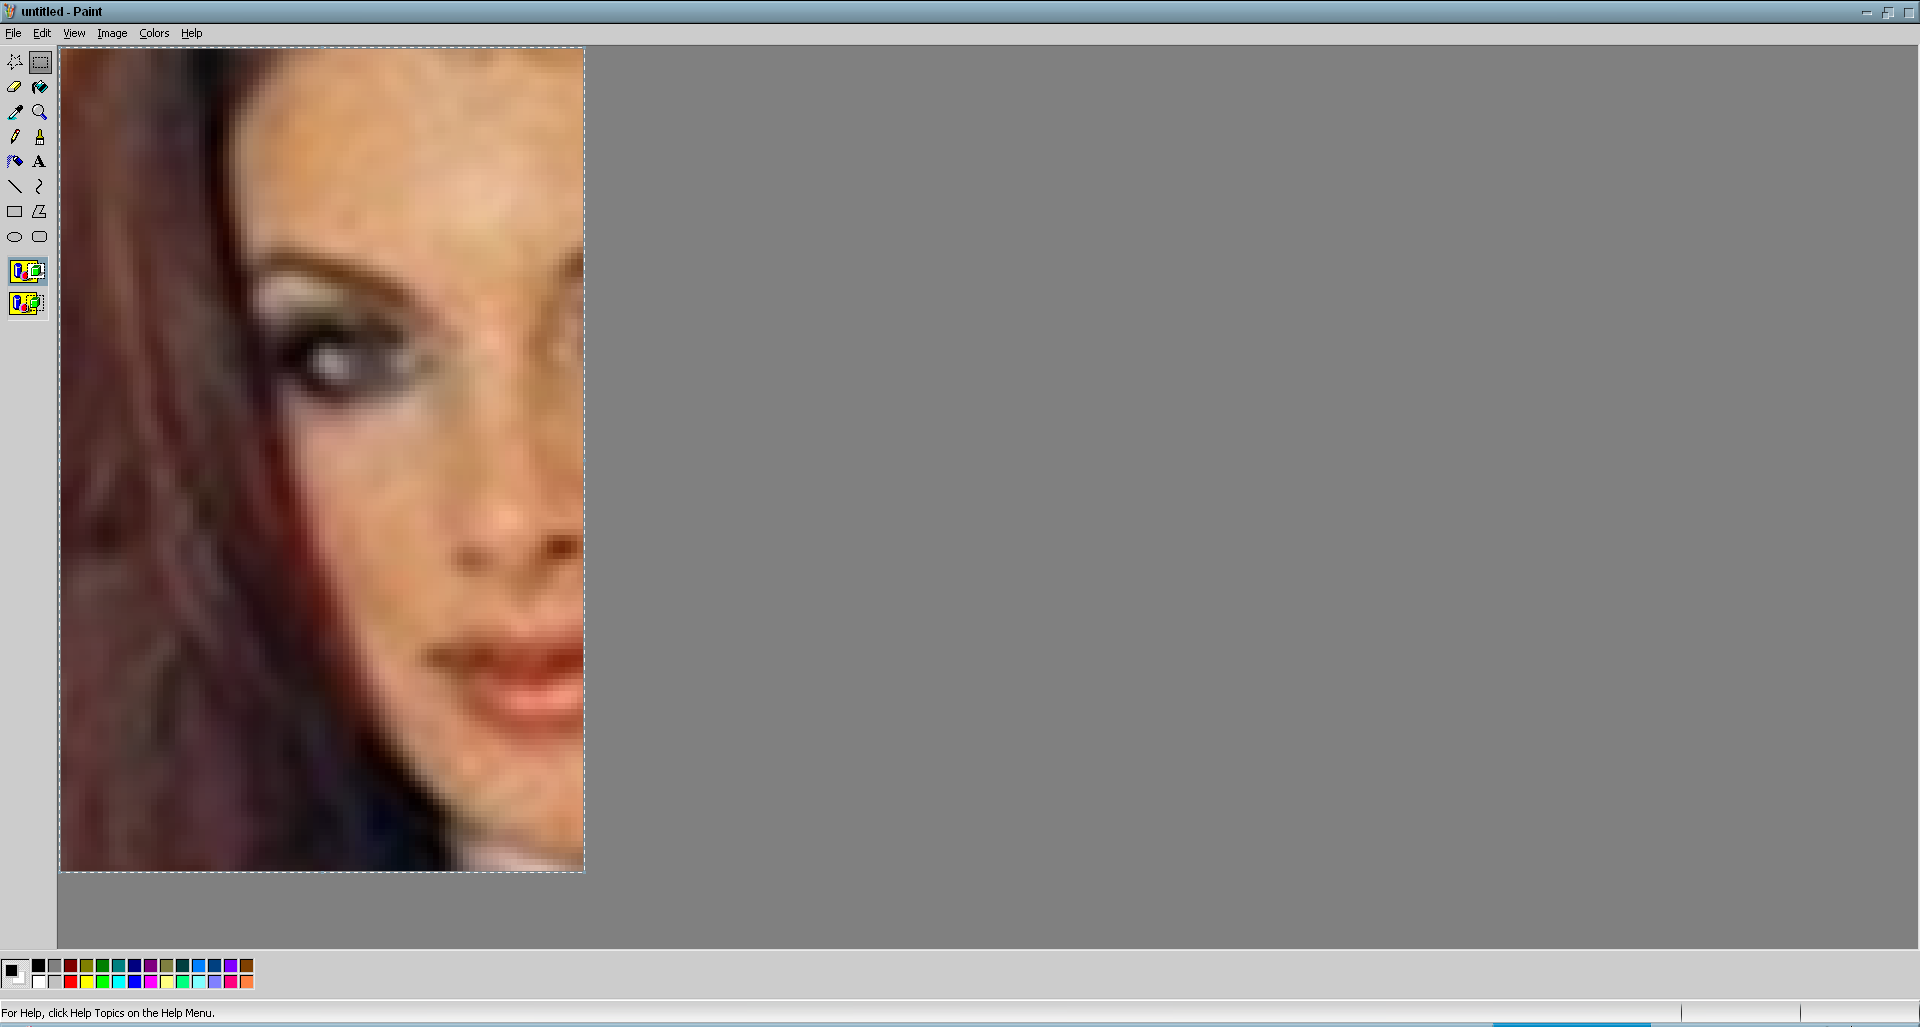
Go back to the original saved PNG in IrfanView. Select the model’s entire face and Copy it. Open up another instance of IrfanView and Paste the image.
Rotate the face image (CTRL+U) so that it matches the way her hand looks.
Copy that image from the 2nd IrfanView. Paste it into the 2nd MS Paint.
Use the Free-Form Select tool to draw the outline of a faceplate on the model’s face, being sure to exactly match the same outline you drew on the electronics. This may take a few attempts.
Copy the faceplate image from the 2nd MS Paint. Paste it into the 1st MS Paint.
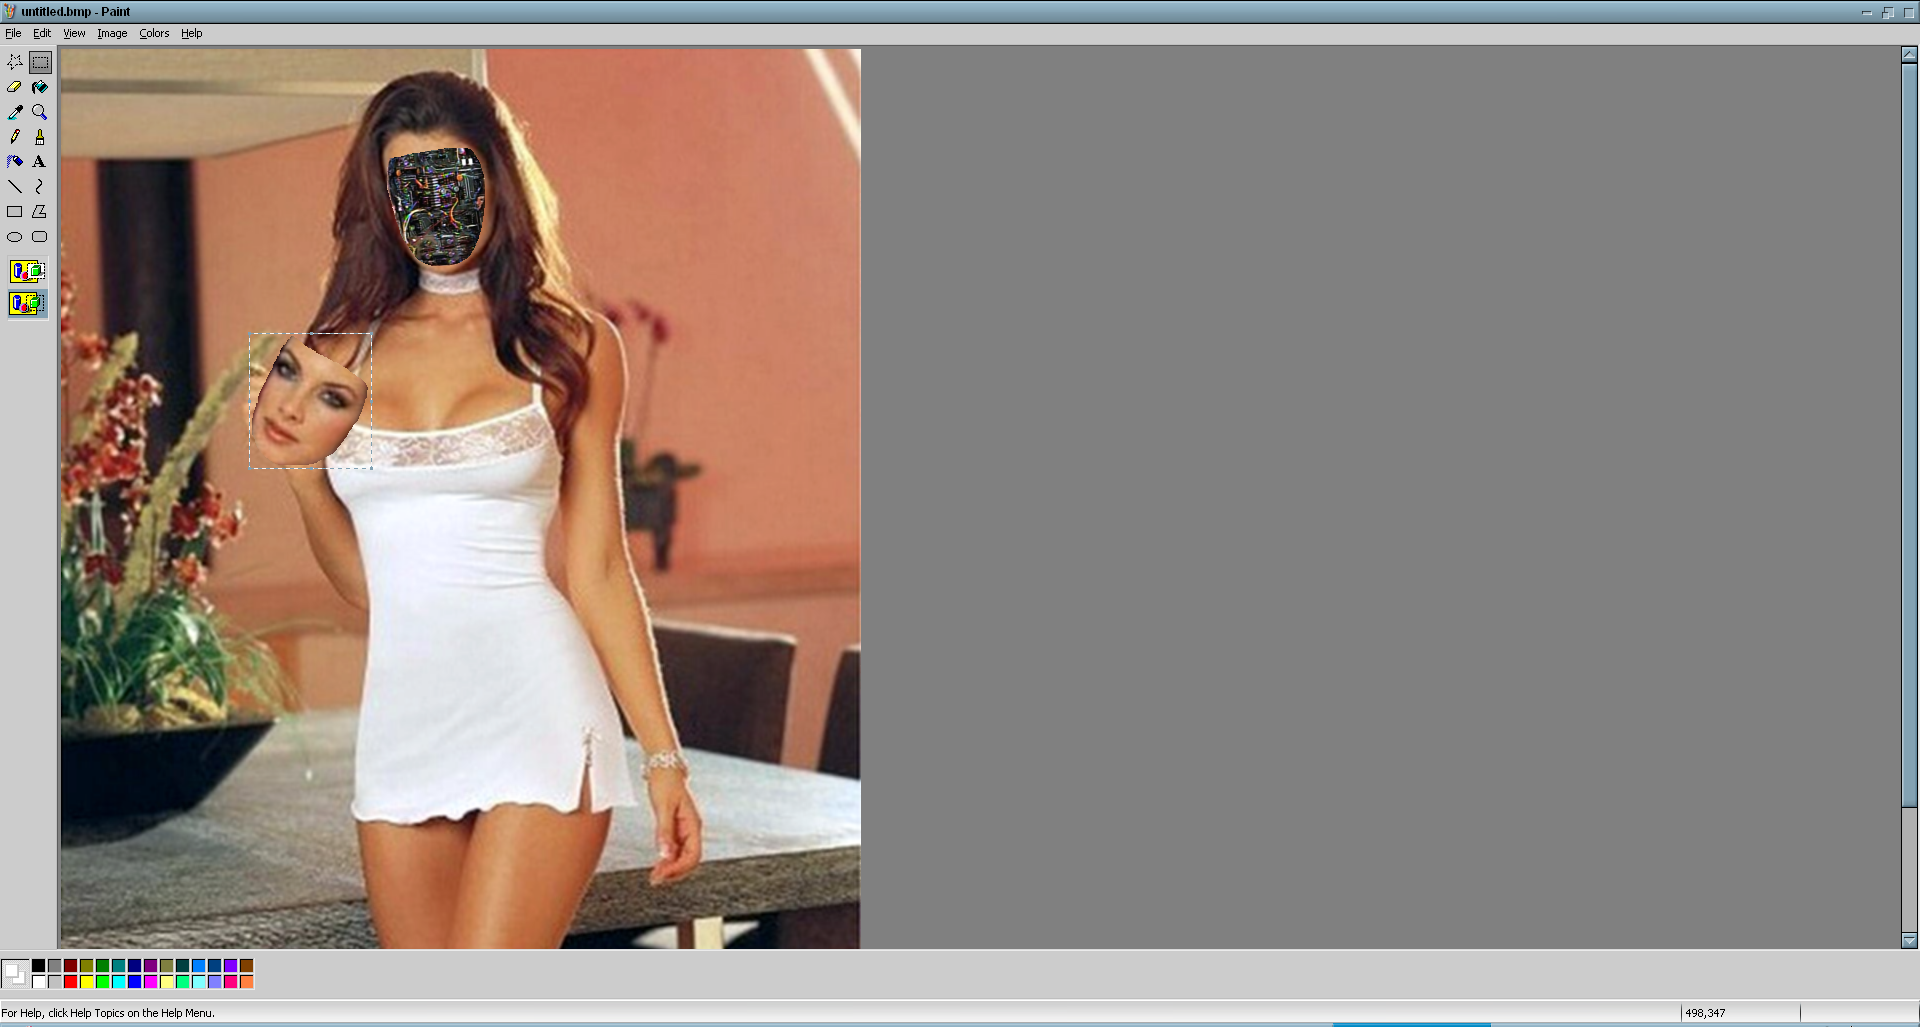
Line up the image so it looks like the model is holding the faceplate in her hand.
Save the BMP.
Go back to the original saved PNG in IrfanView. Select & Copy an area of the model’s hand now covered by the faceplate. Paste it into the 2nd MS Paint.
Use the Free-Form Select tool to follow along the outline of the model’s fingers.
Copy the fingers image from the 2nd MS Paint. Paste it into the 1st MS Paint.

Save the BMP.
We’re now done with MS Paint. Close MS Paint and make a copy of the BMP file. This is important, because you don’t want to mess things up in GIMP and then have nothing to go back to.
Load the BMP copy in GIMP.

Zoom in and select the Blur / Sharpen Tool, brush size 5.

Follow along the edges of the manipulated areas. Don’t blur too much – just enough to blend them in. Remember you can undo/redo and that you can zoom out and back in to see how it looks.
Save the file by selecting File, Overwrite.
Zoom in on the area by the hand, and select the Dodge / Burn Tool. Turn the Exposure down to 20, and draw a shadow under the fingertips.
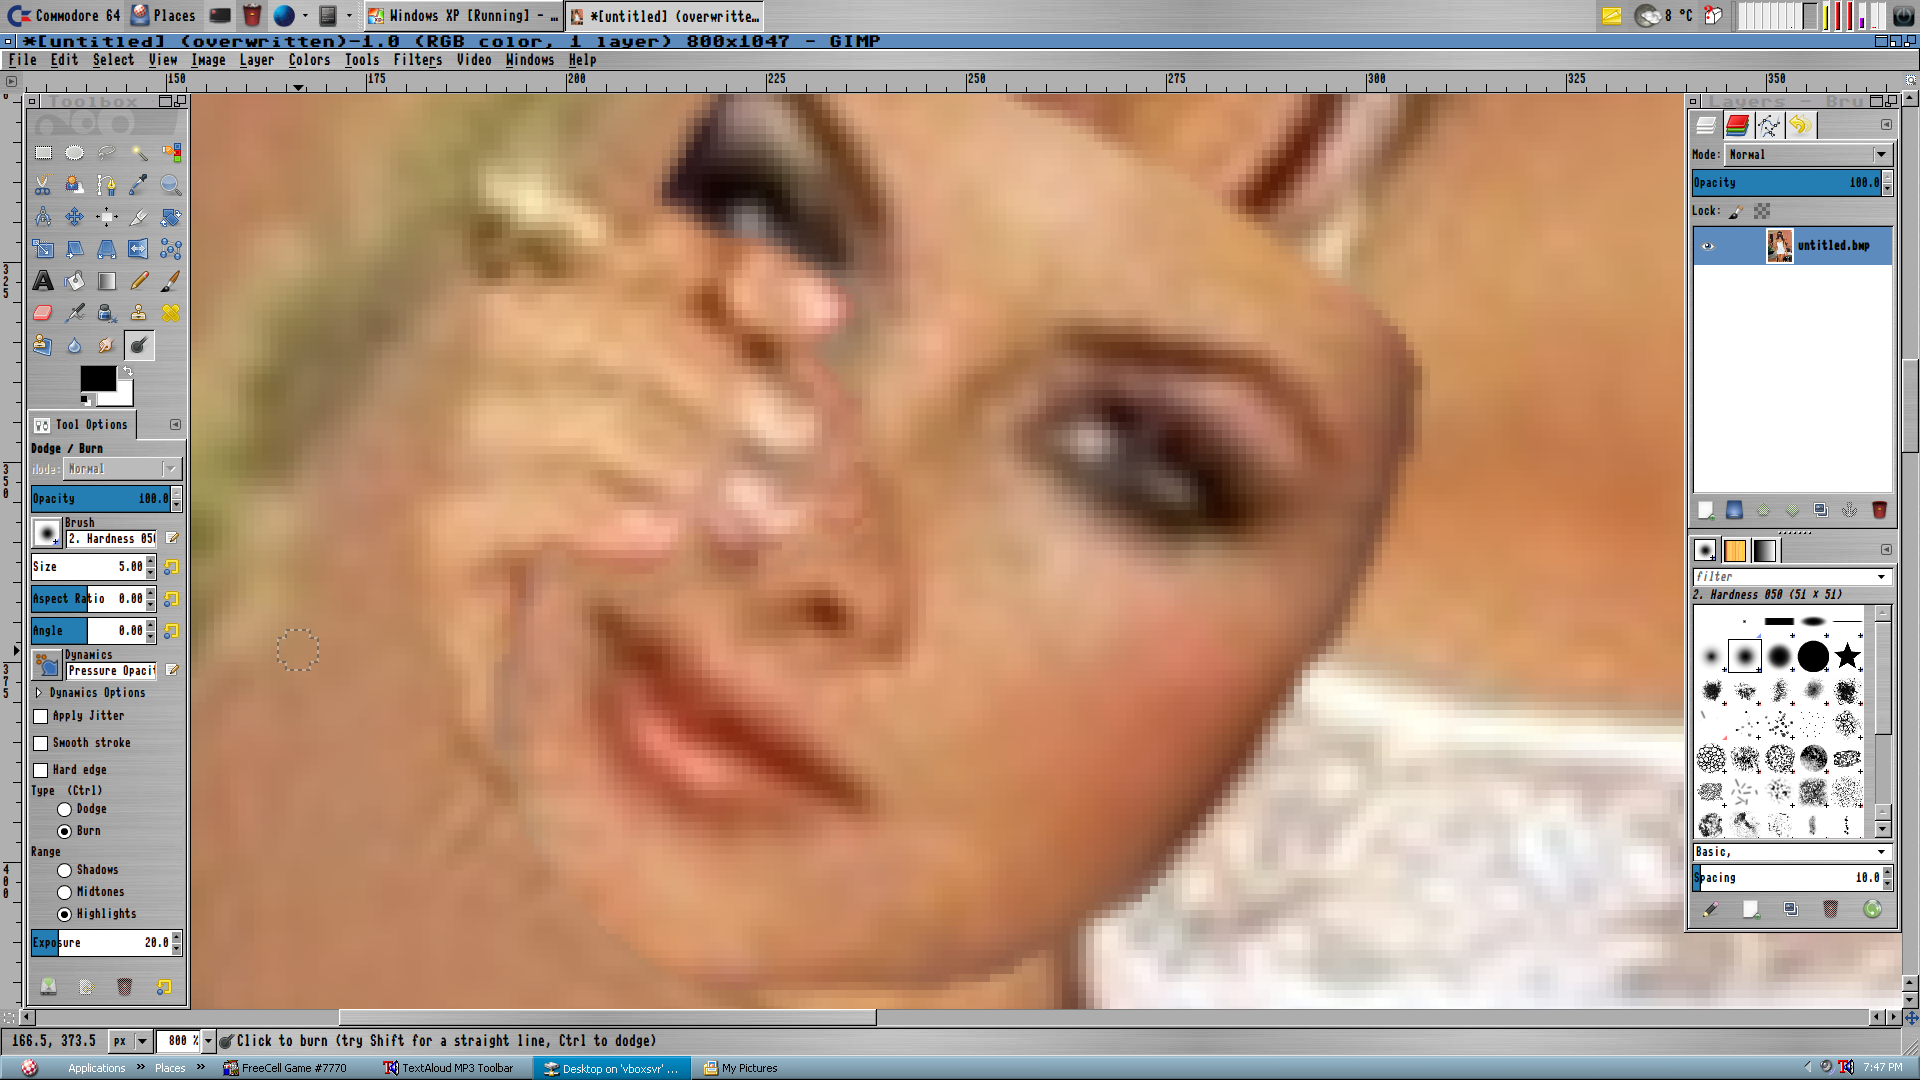
Bring the Brush size down to 2 and draw an outline along the bottom edge of the faceplate.
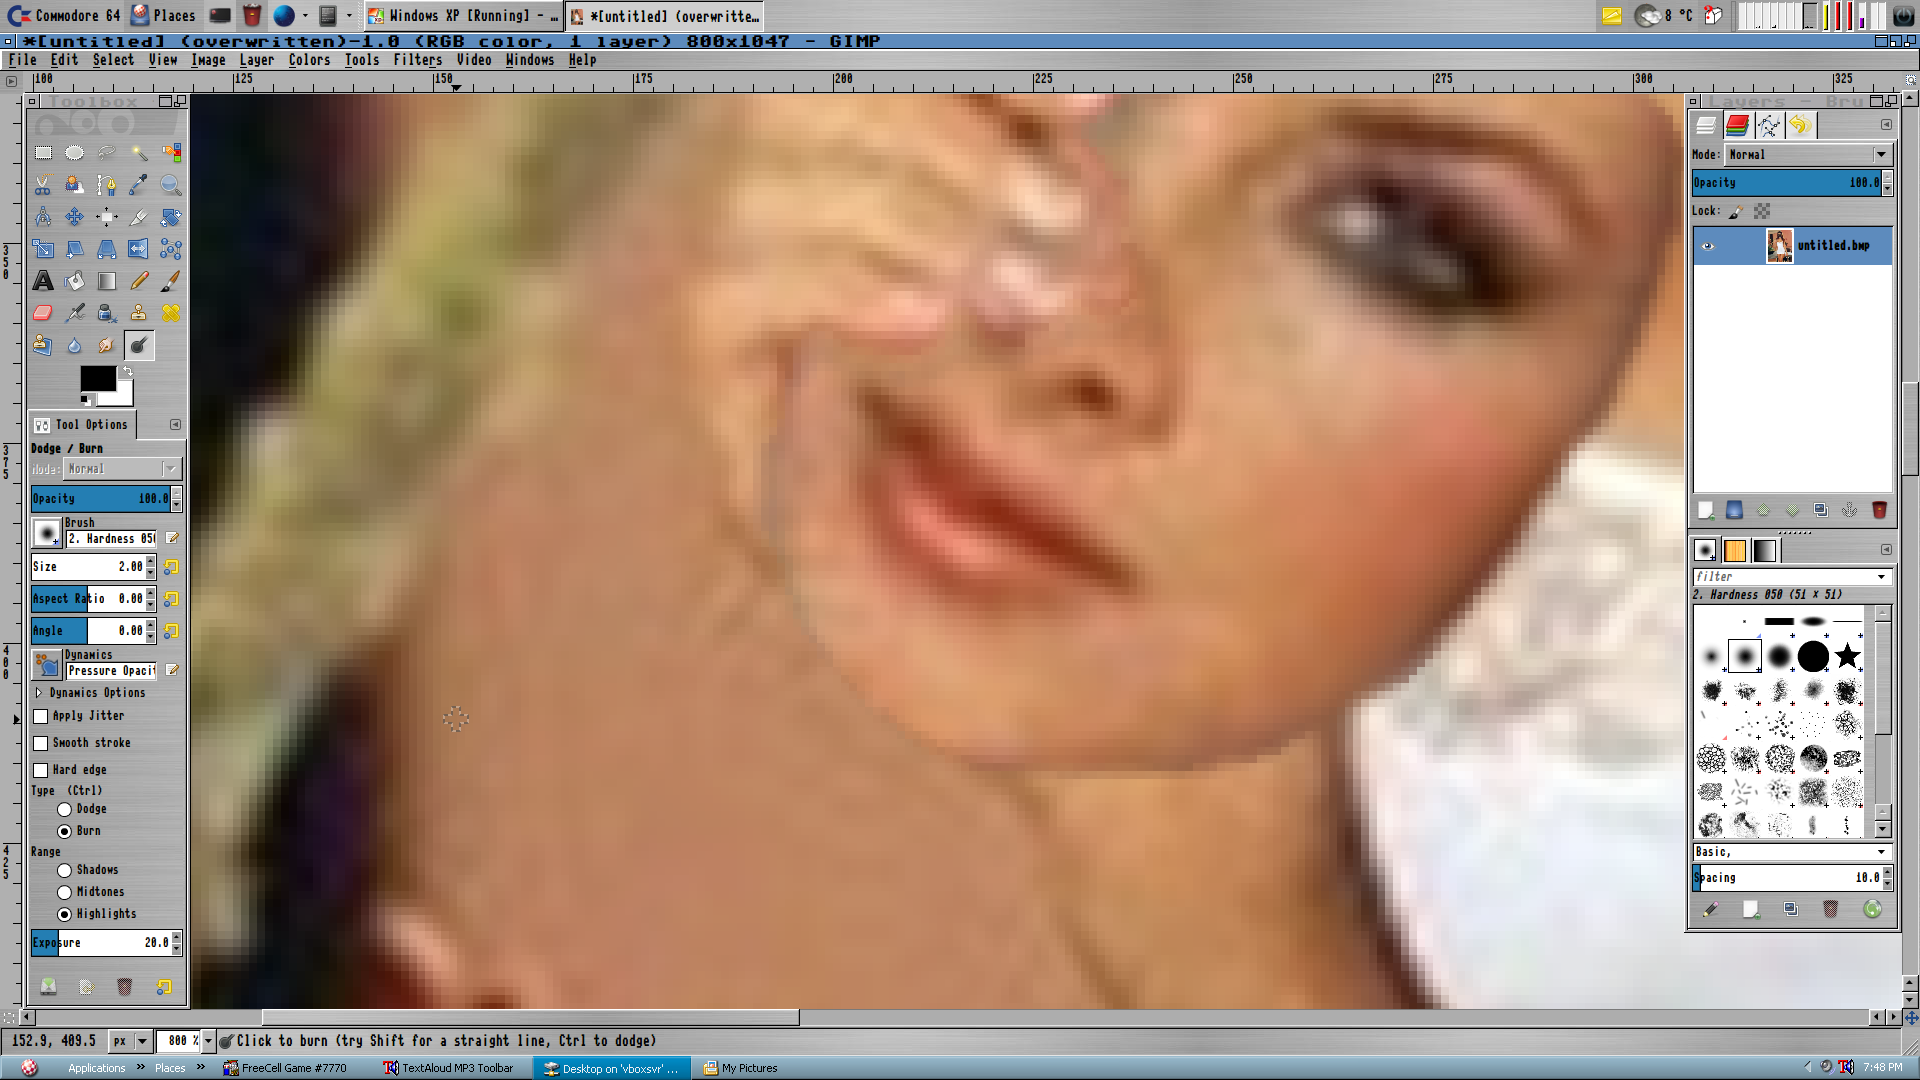
Zoom back out and into the subfacial electronics. Sometimes some shadows or lightening need to be done on this area to make it look better. The only thing that needs to be done here is to change the brush size to 10, bring the Exposure back up to 50, and draw a shadow under the very top edge of the facial opening. This is done with two strokes, one using the Midtones setting and one using the Highlights.
Zoom back in on the hand and use the Dodge setting to lighten and hide the curled hair around and between her fingertips, and clean up the area a bit with the Blur setting.
Overwrite the file.
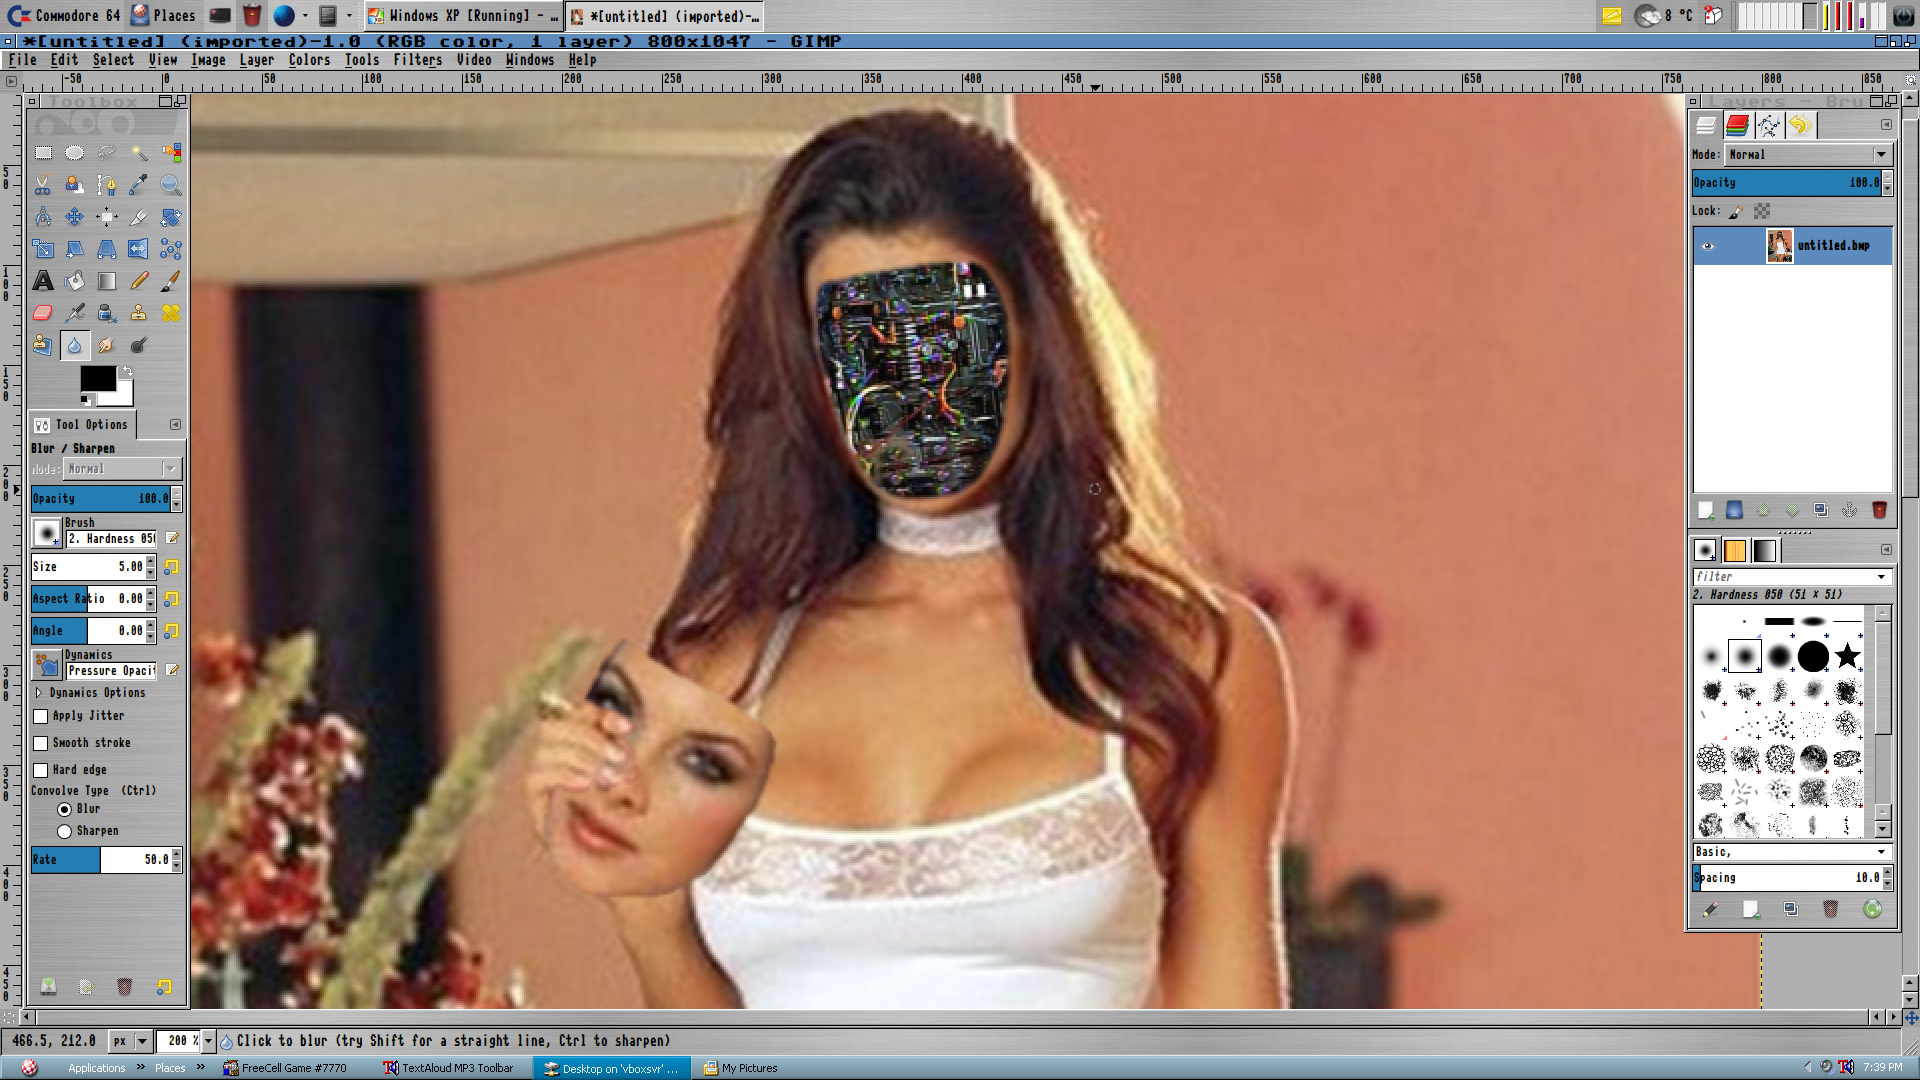
Now to add LED light effects inside her head. Select the Paintbrush tool.
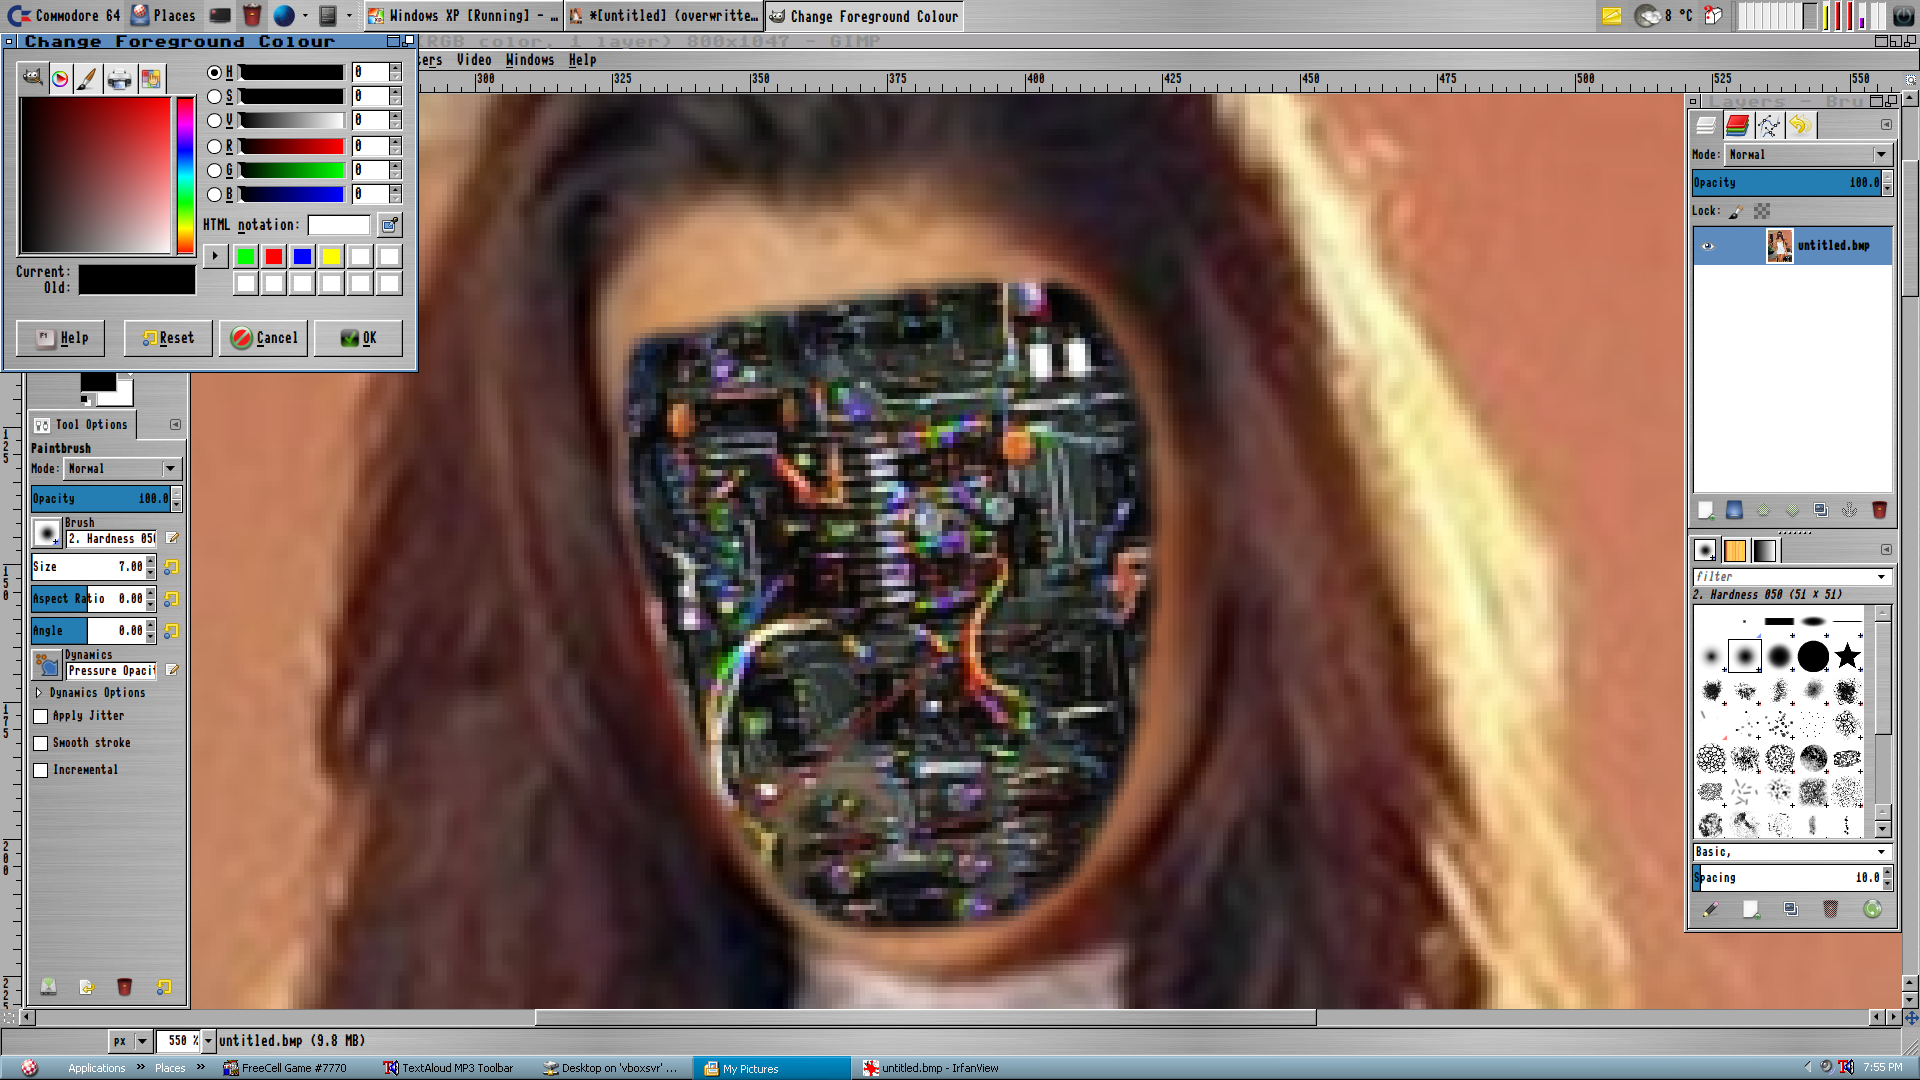
Change the brush colour to primary or secondary colours, like red, green, yellow or blue. These look more like actual lights when applied. Use a brush size consistent to the electronics. 10 worked for this image.

The placement and quantity is up to you.
Overwrite the file.
Zoom out and do a final check to see if you missed anything or if there’s anything else you’d like to change or add.
If not, close, GIMP and load the completed BMP file in IrfanView. Save it as a PNG (with compression level 9). Again – never save as a jpg. Think of a snazzy title.
“Ready”